5 Reasons Homeowners Should Consider 5V Metal Roof Panels

metal roofing panels

As homeowners, we’re often faced with a multitude of decisions when it comes to maintaining and improving our homes. One area that frequently demands attention is the roof—the guardian of our houses, protecting us from the elements. When it comes time to consider roof replacements or upgrades, one option worth exploring is 5V metal roof panels. These panels offer a range of benefits that make them an appealing choice for homeowners looking for durability, sustainability, and aesthetic appeal. In this article, we’ll explore three compelling reasons why homeowners should seriously consider 5V metal roof panels for their next roofing project.

Durability

One of the primary reasons homeowners opt for metal roofing is its exceptional durability. Unlike traditional asphalt shingles that deteriorate over time due to exposure to the sun, rain, and wind, metal roofs are built to withstand the elements for decades. 5V metal roof panels, in particular, are renowned for their robustness and longevity.

Manufactured from high-quality galvanized steel or aluminum, these panels are resistant to rust, corrosion, and fading. This means homeowners can enjoy peace of mind knowing their roof will remain structurally sound and aesthetically pleasing for many years to come. Additionally, metal roofs are highly resistant to fire, making them an ideal choice for homeowners in wildfire-prone areas.

Furthermore, 5V metal roof panels are designed to withstand extreme weather conditions, including high winds and heavy snow loads. Their interlocking design provides added strength and stability, reducing the risk of damage during storms. By investing in a metal roof, homeowners can minimize the need for costly repairs and replacements down the line, ultimately saving time and money in the long run.

Energy Efficiency

n an era where energy efficiency is increasingly important, 5V metal roof panels offer significant advantages over traditional roofing materials. Unlike asphalt shingles, which absorb heat and contribute to higher indoor temperatures, metal roofs reflect solar radiation, helping to keep homes cooler in hot weather.

This reflective property, known as solar reflectance, can lead to substantial energy savings by reducing the need for air conditioning. Additionally, metal roofs can be installed with insulation and ventilation systems that further enhance energy efficiency and indoor comfort.

Moreover, metal roofing is a sustainable choice for environmentally conscious homeowners. Most metal roof panels are made from recycled materials and are fully recyclable at the end of their lifespan. By choosing a metal roof, homeowners can reduce their carbon footprint and contribute to a more sustainable future for our planet.

Aesthetic Appeal

Beyond their durability and energy efficiency, 5V metal roof panels also offer unmatched aesthetic appeal. Available in a variety of colors, finishes, and profiles, metal roofs can complement virtually any architectural style, from modern to rustic.

The distinctive V-shaped ribs of 5V metal roof panels create a visually striking appearance that adds character and dimension to residential properties. Whether you prefer the classic look of bare metal or the warmth of a painted finish, there’s a metal roofing option to suit your taste and enhance the curb appeal of your home.

Furthermore, metal roofs maintain their appearance over time, resisting discoloration, warping, and cracking that can occur with other roofing materials. This means homeowners can enjoy a beautiful and timeless roof that enhances the overall aesthetics of their property for years to come.

Conclusion

In conclusion, 5V metal roof panels offer a compelling array of benefits that make them an excellent choice for homeowners seeking a durable, energy-efficient, and visually appealing roofing solution. With their unmatched durability, energy efficiency, and aesthetic versatility, metal roofs have become increasingly popular in residential construction.

By investing in a 5V metal roof, homeowners can enjoy peace of mind knowing their home is protected by a long-lasting and environmentally friendly roofing system. Whether you’re building a new home or considering a roof replacement, it’s worth exploring the many advantages that 5V metal roof panels have to offer.

Detecting Water Heater Pipe Leaks: 4 Essential Methods for Homeowners

water damage companies near me


Water heater pipe leaks can wreak havoc on your home if left undetected. Not only can they lead to water damage and mold growth, but they can also result in increased utility bills and potential structural damage. Detecting these leaks early is crucial for preventing costly repairs and maintaining the integrity of your home’s plumbing system. In this comprehensive guide, we’ll explore four effective methods for detecting water heater pipe leaks, empowering homeowners to safeguard their properties and wallets.

Visual Inspection

The first step in detecting water heater pipe leaks is a thorough visual inspection. Start by examining the area around your water heater for any signs of moisture, such as puddles or damp spots on the floor. Pay close attention to the pipes leading to and from the water heater, checking for any signs of corrosion, rust, or mineral buildup. Additionally, inspect the fittings and connections for any signs of leaks or water stains. Even a small drip can indicate a larger underlying issue that requires immediate attention.

Pressure Testing

Pressure testing is a more advanced method for detecting water heater pipe leaks, but it can be highly effective in identifying hidden leaks that may not be visible during a visual inspection. To perform a pressure test, first, shut off the water supply to the water heater and turn off the power or gas supply. Next, attach a pressure gauge to the drain valve at the bottom of the water heater and pressurize the system to the recommended pressure (typically around 60 psi). Monitor the pressure gauge for any sudden drops, which could indicate a leak in the system. If the pressure drops significantly over a short period, it’s a strong indication that there’s a leak somewhere in the pipes.

Dye Testing

Dye testing is another method for detecting water heater pipe leaks, particularly in hard-to-reach or hidden areas. This method involves adding a fluorescent dye to the water in the tank and then running the hot water tap for a few minutes. After allowing the dye to circulate through the system, inspect the area around the water heater and any nearby pipes with a UV flashlight. The dye will fluoresce under the UV light, making it easy to spot any leaks or cracks in the pipes. This method is especially useful for identifying leaks in areas where visual inspection is challenging, such as behind walls or in crawl spaces.

Sound Inspection

Sound inspection involves listening for any unusual noises coming from the water heater or the surrounding pipes, which could indicate a leak or other plumbing issue. Start by turning off any appliances or sources of noise in your home to ensure you can hear clearly. Then, stand near the water heater and listen for any hissing, dripping, or banging sounds. These noises could be a sign of water escaping from a leaky pipe or a faulty valve. Additionally, listen for any sounds of water running when no taps or appliances are in use, as this could indicate a hidden leak in the plumbing system.

Conclusion

Detecting a water heater pipe leak early is essential for preventing costly damage and ensuring the continued functionality of your home’s plumbing system. By utilizing a combination of visual inspection, pressure testing, dye testing, and sound inspection, homeowners can effectively identify and address leaks before they escalate into major problems. Regular maintenance and proactive leak detection strategies can save both time and money in the long run, preserving the integrity of your home and providing peace of mind for years to come.

Revitalize Your Pool Deck: 4 Innovative Ways to Resurface

concrete pool deck resurfacing near me


A pool deck is more than just a functional space; it’s an oasis where memories are made and relaxation reigns supreme. However, over time, wear and tear can take its toll, leaving your pool deck looking tired and worn-out. Fortunately, there are numerous ways to breathe new life into your poolside retreat through resurfacing. In this comprehensive guide, we’ll explore four innovative methods to revitalize your pool deck, ensuring it remains a focal point of enjoyment and relaxation for years to come.

Stamped Concrete Overlay

Stamped concrete overlay is a popular choice for pool deck resurfacing due to its versatility and aesthetic appeal. This method involves applying a thin layer of concrete over the existing surface and stamping it with various patterns and textures to mimic the look of natural stone, brick, or tile. Not only does stamped concrete overlay enhance the visual appeal of your pool deck, but it also provides durability and resistance to weathering and fading. Additionally, it can be customized to complement the style of your outdoor space, whether you prefer a rustic, Mediterranean, or contemporary design.

Pavers or Natural Stone Tiles

For homeowners seeking a luxurious and timeless look for their pool deck, pavers or natural stone tiles are an excellent choice. Whether you opt for travertine, limestone, or granite, these materials offer unmatched elegance and durability. Pavers and natural stone tiles come in a variety of shapes, sizes, and colors, allowing for endless design possibilities. Beyond their aesthetic appeal, these materials are slip-resistant and heat-reflective, making them ideal for poolside environments. While the installation process may be more labor-intensive than other methods, the result is a stunning pool deck that exudes sophistication and charm.

Resin Bonded Aggregate

Resin bonded aggregate is a cutting-edge solution for pool deck resurfacing that combines durability with decorative flair. This method involves applying a layer of resin onto the existing surface and then scattering decorative aggregates, such as quartz, granite, or marble chips, onto the resin. Once cured, the result is a seamless and slip-resistant finish that adds texture and visual interest to your pool deck. Resin bonded aggregate is highly customizable, allowing you to create intricate patterns and designs that reflect your personal style. Moreover, it offers excellent resistance to UV rays, chemicals, and abrasion, ensuring long-lasting beauty and performance.

Rubber Surfacing

Rubber surfacing is an innovative and eco-friendly option for pool deck resurfacing that prioritizes safety and comfort. Made from recycled rubber granules bound by a polyurethane resin, this seamless surface provides excellent traction and impact absorption, reducing the risk of slips and falls around the pool area. Rubber surfacing is available in a wide range of colors and thicknesses, allowing for customization to suit your aesthetic preferences and functional needs. Furthermore, it is resistant to fading, staining, and mildew, making it a low-maintenance and long-lasting solution for your pool deck.

Conclusion

Your pool deck is a focal point of outdoor enjoyment and relaxation, and resurfacing is the key to maintaining its beauty and functionality for years to come. Whether you prefer the classic elegance of natural stone, the versatility of stamped concrete, the decorative flair of resin bonded aggregate, or the safety of rubber surfacing, there’s a solution to suit every style and budget. By investing in a pool deck resurface, you can transform your outdoor space into a luxurious oasis that enhances the beauty and value of your home. So why wait? Dive into a pool deck resurfacing project today and rediscover the joy of poolside living.

How to Hire Retaining Wall Contractors Near Me: A Comprehensive Guide

concrete retaining wall contractor


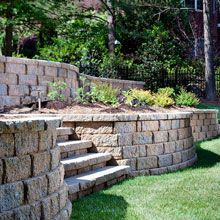
Retaining walls are crucial for maintaining the integrity of landscapes, preventing soil erosion, and enhancing the aesthetic appeal of properties. Whether you’re looking to install a new retaining wall or repair an existing one, finding the right contractor for the job is paramount. However, with numerous options available, the process of hiring a retaining wall contractor near you can be daunting. In this guide, we’ll walk you through the steps to ensure you find the perfect fit for your project.

Define Your Project Needs

Before you start your search for a retaining wall contractor, it’s essential to define your project needs clearly. Determine the purpose of the retaining wall, the size of the area, and any specific design preferences you have in mind. Understanding your requirements will help you communicate effectively with potential contractors and ensure they can meet your expectations.

Research Local Contractors

Start by compiling a list of retaining wall contractors in your area. You can use online directories, search engines, or ask for recommendations from friends, family, or neighbors who have had similar projects done recently. Make sure to research each contractor’s reputation, experience, and portfolio of past projects to gauge their expertise and reliability.

Check Credentials and Licensing

Verify that the contractors on your list are properly licensed and insured. A valid license demonstrates that the contractor has met the necessary qualifications and adheres to industry standards. Insurance coverage protects you from liability in case of accidents or property damage during the project. Don’t hesitate to ask for proof of licensing and insurance before proceeding further.

Look for Experience and Expertise

Experience matters when it comes to constructing retaining walls. Look for contractors who have a proven track record of successfully completing similar projects. An experienced contractor will have the knowledge and skills to handle various challenges that may arise during the construction process. Additionally, consider contractors who specialize in retaining walls specifically, as they will likely have more expertise in this area.

Review Past Work and References

Ask prospective contractors for references from past clients and examples of their completed projects. Take the time to visit these sites if possible or request photos to assess the quality of their workmanship. Speaking with previous clients can provide valuable insights into the contractor’s professionalism, reliability, and communication style. A reputable contractor should be willing to provide references and showcase their portfolio without hesitation.

Obtain Multiple Quotes

Get detailed quotes from several contractors to compare pricing and services offered. Be wary of significantly low or high bids, as they may indicate subpar workmanship or hidden costs. Review each quote carefully to ensure it includes all aspects of the project, such as materials, labor, permits, and any additional fees. Remember that the cheapest option may not always be the best value in the long run.

Ask About Warranties and Guarantees

Inquire about the warranties or guarantees offered by the contractor for their workmanship and materials. A reputable contractor should stand behind their work and be willing to address any issues that may arise after the project is completed. Clarify the terms and duration of the warranty to ensure you are adequately protected against defects or deficiencies.

Communicate Expectations Clearly

Effective communication is key to a successful partnership with your chosen contractor. Clearly communicate your expectations regarding the project timeline, budget, and desired outcomes from the outset. Discuss any concerns or preferences you have and ensure they are reflected in the contract before signing. Establishing open lines of communication will help prevent misunderstandings and ensure a smooth construction process.

Review the Contract Thoroughly

Before finalizing your decision, carefully review the contract provided by the contractor. Make sure it includes all relevant details, such as project scope, timeline, payment schedule, and any warranties or guarantees offered. Seek clarification on any ambiguous terms or clauses and ensure you are comfortable with the agreement before signing. It’s advisable to consult with a legal professional if you have any concerns or questions about the contract terms.

Conclusion

Hiring retaining wall contractors near me doesn’t have to be overwhelming if you approach the process systematically. By defining your project needs, researching local contractors, checking credentials, and thoroughly vetting candidates, you can find a qualified professional who meets your requirements. Remember to prioritize experience, reliability, and communication throughout the selection process to ensure a successful outcome for your retaining wall project. With the right contractor by your side, you can enjoy a structurally sound and visually appealing retaining wall that enhances your property for years to come.

A Comprehensive Guide to Adding a Home Addition in Maryland

home additions contractors near me


Expanding your home with an addition can be an exciting endeavor, offering increased space, functionality, and value to your property. In the state of Maryland, where housing demands often outpace supply, adding a home addition can be a wise investment. However, navigating the process can seem daunting without proper guidance. Fear not! In this comprehensive guide, we’ll walk you through the steps to successfully add a home addition in Maryland.

Part 1: Planning Your Home Addition

Define Your Goals: Begin by clearly defining your objectives for the home addition. Are you looking to add extra living space, create a home office, or perhaps build a guest suite? Understanding your needs will help shape the design and scope of the project.

Set a Budget: Determine how much you’re willing to invest in the home addition. Consider factors such as construction costs, permits, design fees, and any unexpected expenses that may arise during the process. It’s essential to establish a realistic budget to guide your decision-making.

Consult with Professionals: Engage the expertise of architects, designers, and contractors to help bring your vision to life. These professionals can provide valuable insights, advise on zoning regulations, and ensure that your home addition complies with local building codes.

Part 2: Understanding Zoning Regulations and Permits

Research Zoning Laws: Before proceeding with your home addition, familiarize yourself with the zoning regulations in your area. Each county in Maryland may have its own set of rules governing property development, including setback requirements, lot coverage limits, and height restrictions.

Obtain Necessary Permits: Once you’ve finalized your design plans, obtain the required permits from your local jurisdiction. Depending on the scope of your project, you may need building permits, zoning variances, or environmental approvals. Failure to secure proper permits can result in costly delays and legal issues down the line.

Part 3: Designing Your Home Addition

Work with an Architect or Designer: Collaborate with professionals to design a home addition that seamlessly integrates with your existing structure and meets your aesthetic preferences. Consider factors such as architectural style, materials, and energy efficiency during the design phase.

Consider Structural Integrity: Ensure that the structural integrity of your home addition is sound. Factors such as soil conditions, foundation type, and load-bearing walls must be carefully evaluated to prevent structural issues in the future.

Incorporate Sustainable Features: Embrace eco-friendly design principles by incorporating sustainable features into your home addition. This may include energy-efficient windows, insulation, solar panels, or rainwater harvesting systems, reducing your environmental footprint and utility costs over time.

Part 4: Construction and Implementation

Hire Reputable Contractors: Select experienced contractors with a proven track record of delivering quality workmanship. Obtain multiple quotes, check references, and ensure that the contractors are properly licensed and insured.

Establish a Timeline: Work with your contractors to establish a realistic timeline for the construction process. Factor in potential delays due to weather, material shortages, or unforeseen complications to avoid frustration and disappointment.

Monitor Progress Closely: Stay actively involved in the construction process by regularly monitoring progress and addressing any concerns or deviations from the original plan promptly. Effective communication with your contractors is key to ensuring a successful outcome.

Conclusion

Adding a home addition Maryland can be a rewarding endeavor, providing additional space and functionality to accommodate your evolving needs. By following the steps outlined in this comprehensive guide, you can navigate the process with confidence and turn your vision into reality. Remember to plan diligently, adhere to zoning regulations, collaborate with professionals, and prioritize quality craftsmanship throughout the construction process. With careful planning and execution, your home addition will not only enhance your living experience but also increase the value of your property for years to come.

A Comprehensive Guide to Stripping and Waxing Floors: Transform Your Space with a Gleaming Finish

stripping and waxing floors

Floors are often the unsung heroes of our living spaces, enduring daily foot traffic and spills while silently supporting our activities. However, over time, even the most resilient floors can lose their luster, accumulating grime, scratches, and scuff marks. This is where the transformative power of stripping and waxing comes into play. In this comprehensive guide, we will delve into the step-by-step process of stripping and waxing floors, equipping you with the knowledge to rejuvenate your floors and breathe new life into your space.

Assessing the Condition of Your Floors

Before diving into the stripping and waxing process, it’s essential to assess the condition of your floors. Determine the type of flooring material you have, whether it’s vinyl, linoleum, hardwood, or another type, as different materials may require specific treatment methods. Inspect the floor for any deep scratches, stains, or areas of heavy wear, as these may require extra attention during the restoration process.

Gathering the Necessary Supplies

To effectively strip and wax your floors, you’ll need the following supplies:

  • Floor stripper
  • Wax remover
  • Bucket
  • Mop
  • Scrub brush or floor scrubber
  • Wet vacuum or mop
  • Floor wax
  • Floor wax applicator or mop
  • Buffing machine (optional)

Ensure that you have all the necessary supplies on hand before beginning the process to avoid interruptions.

Preparing the Area

Prepare the area by removing any furniture, rugs, or obstacles from the floor. This will allow for unobstructed access and ensure thorough cleaning and waxing. Additionally, ensure adequate ventilation in the area to prevent the buildup of fumes from the stripping and waxing products.

Stripping the Floor

Start by diluting the floor stripper according to the manufacturer’s instructions. Apply the stripper to a small section of the floor using a mop or applicator, ensuring even coverage. Allow the stripper to sit for the recommended dwell time, typically 10-15 minutes, to penetrate and loosen the old wax and grime.

Next, agitate the stripper using a scrub brush or floor scrubber to help lift stubborn dirt and wax buildup. Work in small sections, overlapping each area slightly to ensure thorough coverage. Once the wax has been loosened, use a wet vacuum or mop to remove the stripper and dissolved wax from the floor.

Removing Residual Wax

After stripping the floor, there may still be traces of residual wax or stubborn stains remaining. In such cases, apply a wax remover or degreaser to the affected areas and allow it to sit for a few minutes. Then, scrub the area using a scrub brush or floor scrubber to lift away the remaining wax and stains. Rinse the floor thoroughly with clean water to remove any traces of the remover.

Waxing the Floor

Once the floor is clean and free of old wax, it’s time to apply a fresh coat of wax to protect and beautify the surface. Choose a high-quality floor wax suited to your specific flooring material and desired finish. Pour a small amount of wax onto the floor and spread it evenly using a floor wax applicator or mop, working in small sections to ensure uniform coverage.

Allow the first coat of wax to dry completely, typically 30-60 minutes, before applying additional coats as needed to achieve the desired level of shine and protection. For optimal results, follow the manufacturer’s recommendations regarding the number of coats and drying times between applications.

Buffing the Floor (Optional)

For an extra layer of polish and shine, consider buffing the floor once the wax has dried completely. Using a buffing machine fitted with a soft pad, gently buff the floor in circular motions to bring out the natural luster of the wax and create a smooth, glossy finish.

Conclusion

To strip and wax floors is a labor-intensive process, but the results are well worth the effort. By following the step-by-step guide outlined above, you can transform dull, worn-out floors into gleaming, like-new surfaces that enhance the beauty and functionality of your space. Whether you’re tackling a residential or commercial project, proper floor maintenance is key to prolonging the lifespan of your floors and keeping them looking their best for years to come. So roll up your sleeves, gather your supplies, and embark on the journey to floor restoration – your space will thank you for it!

The Ultimate Guide: When Should a Los Angeles Homeowner Do a Kitchen Remodel?

kitchen remodeling California


As a homeowner in the vibrant city of Los Angeles, there often comes a time when the desire to upgrade your living space becomes irresistible. Among the various areas of the home, the kitchen stands as a focal point, not only for its functional importance but also for its role as a hub of social interaction and culinary creativity. However, deciding when to embark on a kitchen remodel can be a daunting task. Factors such as budget, time, and necessity all come into play. In this comprehensive guide, we’ll delve into the considerations that should inform your decision-making process, providing insights tailored to the unique context of Los Angeles homeowners.

Assessing Functionality and Wear

    • The first step in determining whether a kitchen remodel is warranted is to assess the functionality and condition of your current space.
    • Look out for signs of wear and tear such as peeling countertops, malfunctioning appliances, outdated plumbing, or inadequate storage space.
    • If your kitchen’s layout inhibits efficiency or fails to accommodate your evolving lifestyle needs, it might be time for a remodel.

Changing Lifestyle and Family Dynamics

      • As families grow and lifestyles evolve, so do the demands placed on the kitchen.
      • Consider whether your current kitchen layout and features adequately support your family’s activities and preferences.
      • Factors such as increased cooking frequency, entertaining guests, or accommodating aging family members may necessitate a remodel to optimize functionality and convenience.

Keeping Up with Design Trends

        • Los Angeles is renowned for its trendsetting culture, and this extends to home design trends as well.
        • If your kitchen feels outdated compared to the latest trends in interior design and kitchen technology, a remodel can breathe new life into your space.
        • Consult with design professionals to explore contemporary styles and innovative features that can enhance both aesthetics and functionality.

Increasing Property Value

          • A well-executed kitchen remodel has the potential to significantly increase the value of your Los Angeles home.
          • Research local real estate trends and consult with real estate professionals to determine which upgrades are most likely to yield a favorable return on investment.
          • Focus on high-impact improvements that appeal to potential buyers, such as modern appliances, quality countertops, and efficient storage solutions.

Energy Efficiency and Sustainability

            • With growing awareness of environmental issues, many homeowners in Los Angeles are prioritizing energy efficiency and sustainability in their home improvements.
            • A kitchen remodel provides an opportunity to upgrade to energy-efficient appliances, eco-friendly materials, and water-saving fixtures, reducing your carbon footprint and utility bills.
            • Explore options such as Energy Star-rated appliances, LED lighting, and recycled or reclaimed materials to align your kitchen remodel with sustainable principles.

Seizing Opportunity in Market Conditions

              • Market conditions can also influence the decision to remodel your kitchen.
              • In a competitive real estate market like Los Angeles, investing in strategic upgrades can give your home a competitive edge and attract potential buyers.
              • Monitor housing trends and economic indicators to identify favorable times for initiating a remodel project, maximizing the potential return on your investment.

Conclusion

Deciding when to undertake a kitchen remodel Los Angeles as a homeowner involves a careful balancing act of practical considerations, aesthetic preferences, and market dynamics. By assessing the functionality and condition of your current kitchen, considering changes in lifestyle and family dynamics, staying abreast of design trends, and prioritizing energy efficiency and sustainability, you can make an informed decision that aligns with your goals and values. Whether you’re aiming to enhance your living experience, increase property value, or minimize your environmental footprint, a well-executed kitchen remodel can transform your space into a stylish, functional, and eco-friendly haven that reflects the vibrant spirit of Los Angeles living.

Breathing Clean: The Crucial Importance of Air Duct Cleaning in Your Seabrook Island, SC Home

duct cleaners near me


Your home is your sanctuary, a place where you seek refuge from the hustle and bustle of daily life. While you focus on creating a comfortable and inviting living space, there’s an aspect that often goes unnoticed – the air you breathe. The air ducts in your Seabrook Island, SC home play a vital role in maintaining a healthy indoor environment. In this blog post, we will delve into the importance of air duct cleaning and why it should be a priority for every homeowner.

The Hidden Culprits

Air ducts serve as the respiratory system of your home, circulating air throughout the living spaces. Over time, these ducts accumulate dust, dirt, pet dander, and other pollutants. Mold growth can also occur, especially in humid climates like Seabrook Island. These hidden culprits not only compromise the air quality but also affect the efficiency of your HVAC system.

Health Implications

The quality of indoor air has a direct impact on your health and well-being. Dirty air ducts can contribute to respiratory issues, allergies, and other health problems. For individuals with pre-existing conditions such as asthma or allergies, the consequences can be more severe. Regular air duct cleaning is a proactive measure to ensure that the air you breathe is clean and safe for you and your family.

Energy Efficiency Matters

Clean air ducts contribute to the overall efficiency of your heating, ventilation, and air conditioning (HVAC) system. When ducts are clogged with debris, the system has to work harder to maintain the desired temperature. This increased workload not only results in higher energy bills but also accelerates wear and tear on your HVAC equipment. Investing in air duct cleaning is, therefore, a smart move to enhance energy efficiency and extend the lifespan of your system.

Preserve Indoor Air Quality

Seabrook Island’s coastal charm comes with its share of unique challenges. High humidity levels can lead to mold growth, which can find its way into your home’s air ducts. Mold spores circulating through the air pose a significant threat to indoor air quality. Professional air duct cleaning removes these contaminants, preserving the freshness and cleanliness of the air you breathe.

A Breath of Fresh Air: The Cleaning Process

Professional air duct cleaning involves a thorough inspection and cleaning of the entire HVAC system. Certified technicians use specialized equipment to dislodge and remove accumulated debris. This process includes cleaning not only the ducts but also the various components of the HVAC system, such as coils, fans, and registers. A comprehensive cleaning ensures that every nook and cranny is free from contaminants.

DIY vs. Professional Cleaning

While some homeowners may attempt to clean their air ducts using DIY methods, the results may not be as effective as professional cleaning. Certified technicians have the knowledge, experience, and equipment to carry out a thorough cleaning that addresses all potential issues. Investing in professional services ensures that the job is done right the first time, providing you with peace of mind and a healthier home environment.

Conclusion

In the pursuit of a comfortable and healthy home on Seabrook Island, SC, air duct cleaning should be a top priority. The hidden contaminants within your HVAC system can impact not only your health but also the efficiency of your home’s heating and cooling. By investing in regular professional Seabrook Island air duct cleaning, you take a proactive step toward ensuring that the air you and your loved ones breathe is clean, fresh, and conducive to a happy and healthy lifestyle. Breathe easy and enjoy the comfort of a home that prioritizes air quality through regular air duct maintenance.

Enhancing Your Home: Why Hiring a Home Remodel Design Consultant is Essential

home remodel designers near me


Embarking on a home renovation project is an exciting endeavor that promises to rejuvenate your living space and elevate your lifestyle. However, the path to achieving your dream home is often fraught with challenges, ranging from design dilemmas to budget constraints. This is where a home remodel design consultant steps in, acting as a guiding beacon through the maze of choices and decisions. In this article, we’ll delve into the significance of hiring a home remodel design consultant and how their expertise can turn your renovation aspirations into reality.

Understanding the Role of a Home Remodel Design Consultant

At its core, a home remodel design consultant is a professional equipped with a unique blend of creative flair, technical knowledge, and industry experience. They serve as a liaison between your vision and the practicalities of remodeling, bridging the gap between concept and execution. Their primary role revolves around conceptualizing, planning, and orchestrating the renovation process, ensuring that your desires are translated into tangible results while adhering to structural constraints, building codes, and budgetary considerations.

The Benefits of Engaging a Home Remodel Design Consultant

Tailored Design Expertise: One of the foremost advantages of hiring a design consultant is access to tailored expertise. These professionals possess an astute eye for design, understanding your preferences, lifestyle, and the architectural nuances of your home. Whether it’s a modern, minimalist kitchen or a cozy, traditional living room, their design acumen can transform your ideas into meticulously crafted blueprints.

Comprehensive Project Management: Renovation projects involve a multitude of tasks, from selecting materials to coordinating contractors. A design consultant serves as a project manager, overseeing every aspect of the process. They handle scheduling, budget management, contractor liaison, and quality control, ensuring that the project progresses smoothly while maintaining high standards.

Budget Optimization: Despite the misconception that hiring a consultant inflates costs, their involvement often leads to budget optimization. By leveraging their industry connections and knowledge of cost-effective alternatives, they can help you make informed decisions that align with your budget without compromising on quality or design integrity.

Avoiding Costly Mistakes: Home renovations are rife with potential pitfalls, ranging from design flaws to construction errors. A design consultant’s expertise minimizes these risks, preventing costly mistakes that might arise from inaccurate measurements, incompatible design elements, or misguided material choices.

Access to Resources and Networks: Design consultants have extensive networks within the industry, granting access to reputable contractors, suppliers, and artisans. This access ensures a pool of reliable professionals working on your project, enhancing the overall quality and efficiency of the renovation.

Conclusion

In essence, a home remodel design consultant is an invaluable asset in the pursuit of a successful home renovation. Their expertise, creativity, and ability to navigate the complexities of remodeling projects are instrumental in bringing your vision to life while ensuring a seamless and stress-free experience. By enlisting their services, you not only elevate the aesthetics and functionality of your home but also safeguard your investment by mitigating potential risks and maximizing the value of every dollar spent. Embrace the transformational journey of remodeling with the guidance of a skilled design consultant and watch as your dream home unfolds before your eyes.

How to Get an Affordable New Kitchen: Transforming Your Space on a Budget

Affordable New Kitchen


The kitchen is often considered the heart of the home, a place where memories are made and delicious meals are prepared. However, a kitchen renovation can be a daunting prospect, especially when faced with a tight budget. The good news is that creating your dream kitchen doesn’t have to break the bank. In this article, we will explore practical and creative ways to achieve an affordable new kitchen without compromising on quality or style. From careful planning and cost-effective materials to DIY projects and smart shopping tips, we’ve got you covered.

Set a Realistic Budget

Before diving into your kitchen renovation, it’s crucial to establish a realistic budget. Determine how much you can comfortably spend and prioritize your expenses accordingly. This will help you make informed decisions throughout the process and avoid overspending.

Plan and Research

Proper planning is the foundation of a successful and affordable kitchen renovation. Take the time to research different design styles, layouts, and materials. Explore home improvement websites, magazines, and social media platforms for inspiration. Additionally, consider consulting with kitchen designers or contractors to gather valuable insights and cost-saving tips.

DIY vs. Professional Help

One of the most effective ways to save money on your kitchen renovation is by taking on certain tasks yourself. Simple tasks such as painting cabinets, installing backsplashes, or replacing hardware can be done with basic DIY skills. However, for complex tasks like plumbing or electrical work, it’s advisable to hire professionals to ensure safety and compliance with building codes.

Reface Rather Than Replace

If your kitchen cabinets are in good condition but look outdated, consider refacing them instead of replacing them entirely. Refacing involves applying a new veneer or laminates to the existing cabinet frames and replacing the doors and hardware. This significantly reduces costs while giving your kitchen a fresh, updated look.

Optimize Layout and Functionality

Sometimes, reconfiguring your kitchen layout can make a world of difference without major structural changes. By optimizing the placement of appliances, sink, and workstations, you can enhance the functionality and flow of your kitchen. This can often be achieved without significant expenses, making it a cost-effective way to transform your space.

Cost-Effective Materials

Choosing cost-effective materials is crucial to staying within your budget. An affordable kitchen and bath contractor told me to consider alternatives to high-end materials like granite countertops, such as laminate or butcher block, which offer similar aesthetics at a fraction of the cost. For flooring, options like vinyl or engineered wood can be durable and visually appealing, without the hefty price tag.

Repurpose and Upcycle

Don’t overlook the potential of repurposing and upcycling existing elements in your kitchen. Instead of buying brand-new furniture, consider refinishing or painting your current ones to give them a fresh look. Similarly, salvaging and repurposing materials like old doors, windows, or reclaimed wood can add character and uniqueness to your kitchen.

Shop Smart

When it comes to purchasing appliances, fixtures, and accessories, be a smart shopper. Look out for sales, discounts, and clearance events at local home improvement stores. Consider purchasing open-box or floor models, which are often offered at significantly reduced prices. Online shopping can also provide access to a wider range of options and competitive prices.

Conclusion

Achieving an affordable new kitchen is not an impossible task. With careful planning, resourcefulness, and a dash of creativity, you can transform your kitchen into a beautiful and functional space without breaking the bank. Remember to set a realistic budget, research your options, and consider DIY projects when appropriate. Refacing cabinets, optimizing layout, and choosing cost-effective materials are all effective strategies to keep costs down. Finally, shop smartly by seeking out discounts and sales, and don’t forget the potential of repurposing and upcycling. By following these tips, you can create the kitchen of your dreams while staying within your financial means.